Doctors typically recommend six key exercises for strengthening the sacroiliac joint: pelvic tilts, bridges, clamshells, bird-dogs, side planks, and targeted stretches for the hamstrings and hip flexors. These exercises work by strengthening the core muscles and gluteus maximus—the stabilizers that support the sacroiliac joint and reduce excessive motion that causes pain. Physical therapy and exercise-based treatment are considered the first-line approach for sacroiliac joint dysfunction, with clinical research showing meaningful pain reduction within three weeks of consistent strengthening work.
This article walks through each of the six recommended exercises, explains the science behind why they work, and provides guidance on implementing a safe, effective routine. The sacroiliac joint connects your lower spine to your pelvis, and when it becomes unstable or misaligned, it can trigger lower back pain, hip discomfort, and difficulty walking or standing. For people managing dementia or other conditions that affect mobility and balance, maintaining a stable sacroiliac joint becomes even more important for preserving independence and preventing falls. The good news is that the exercises doctors recommend are straightforward, require no special equipment, and can be performed at home under professional guidance.
Table of Contents
- Understanding the Sacroiliac Joint and Why Strengthening Matters
- The Science Behind Exercise-Based Treatment for Sacroiliac Joint Dysfunction
- Pelvic Tilts and Bridges—Foundational Strengthening Exercises
- Clamshells, Bird-Dogs, and Side Planks—Advancing to Stability Exercises
- Stretching and Flexibility—Addressing Tightness to Support Stability
- Progression and Avoiding Common Mistakes That Can Delay Recovery
- Professional Guidance and Long-Term Maintenance for Sustained Improvement
- Conclusion
Understanding the Sacroiliac Joint and Why Strengthening Matters
The sacroiliac joint is one of the most commonly overlooked structures in the body, yet it plays a critical role in transferring force from your upper body through your pelvis and into your legs. Because it sits at the junction between the spine and pelvis, any instability or weakness here ripples upward into the lower back and downward into the hips and knees. When the muscles supporting this joint weaken—particularly the gluteus maximus, core muscles like the erector spinae and rectus abdominis, and the biceps femoris—the joint begins to move excessively, causing inflammation and pain. Gluteus maximus dysfunction is one of the most common findings in people with sacroiliac joint pain.
Many people, especially those who sit for prolonged periods, have weak or underactive glutes. Without strong glute activation, the burden of stabilizing the pelvis falls on the sacroiliac joint ligaments, which are not designed to absorb that much stress. However, if you target the right muscles with the right exercises, research shows that you can restore stability and reduce pain within weeks. Studies have documented pain score improvements from severe levels to minimal discomfort—often from 10/10 down to 2/10—after just three weeks of consistent, individual strengthening exercises.
The Science Behind Exercise-Based Treatment for Sacroiliac Joint Dysfunction
Physical therapy combining manual therapy with specific strengthening exercises has been shown to be more effective than either treatment alone. This means that while stretching and mobility work are important, targeted strength training is essential. The exercises recommended by doctors are designed to increase what’s called “stabilization torque”—the rotational strength needed to keep the joint from moving excessively. The key muscles involved are the erector spinae (muscles along the spine), the rectus abdominis (core), and the biceps femoris (hamstring), along with the glutes.
One limitation to understand is that exercise alone may not be sufficient if you have severe structural damage, a significant leg length discrepancy, or if your sacroiliac joint is severely misaligned. In these cases, you may benefit from manual therapy, bracing, or imaging to rule out other conditions. However, for the majority of people with sacroiliac joint pain, evidence supports starting with a consistent exercise program under the guidance of a physical therapist. The exercises need to be performed with proper form and at an appropriate intensity to be effective—simply going through the motions without proper muscle activation won’t produce the results documented in clinical research.
Pelvic Tilts and Bridges—Foundational Strengthening Exercises
pelvic tilts are often the starting point for sacroiliac stabilization because they teach you how to engage your core and control your pelvis. To perform a pelvic tilt, lie on your back with your knees bent and feet flat on the floor, hip-width apart. Gently tilt your pelvis so that your lower back flattens against the floor—you should feel your abdominal muscles tighten. Hold this position for a few seconds, then relax. Repeat for 10 to 15 repetitions. This exercise sounds simple, but its purpose is important: it activates the muscles you’ll need for all the more challenging exercises that follow. Bridges build on this foundation by adding glute activation and hip extension.
Lie on your back with knees bent, then squeeze your glutes and lift your hips upward until your body forms a straight line from knees to shoulders. Hold for five seconds, then lower down. Perform 10 to 15 repetitions. The bridge is more demanding than pelvic tilts, and you should feel it primarily in your glutes and the back of your thighs rather than your lower back. A common mistake is lifting too high or bouncing, which reduces muscle engagement. Instead, move slowly and deliberately, focusing on squeezing your glutes throughout the movement. If five seconds feels too long at first, hold for two to three seconds and gradually work up as your strength improves.

Clamshells, Bird-Dogs, and Side Planks—Advancing to Stability Exercises
Clamshells target the hip abductors and gluteus medius, muscles that are critical for hip stability. Lie on your side with your hips and knees bent at 45 degrees. Keeping your feet together, open your top knee upward like a clamshell, then close it. Perform 15 to 20 repetitions on each side. This exercise is deceptively challenging—you should feel it on the outside of your hip and upper glute, not in your hip flexors or lower back. Bird-dogs are among the most effective exercises for sacroiliac stability because they require core engagement and balance simultaneously. Start on your hands and knees. Extend your right arm forward and left leg backward, creating a straight line from fingertips to heel. Hold for a few seconds, then return to start and repeat on the opposite side.
Perform 10 to 12 repetitions on each side. The key is moving slowly and avoiding rotation—your hips and shoulders should stay level throughout. If balancing is difficult at first, you can modify the exercise by extending only your leg or only your arm, rather than both simultaneously. Side planks provide a more intense core challenge and directly stabilize the sacroiliac joint under load. Lie on your side, supporting your weight on your forearm and the outer edge of your lower foot. Your body should form a straight line from head to heels. Hold for 20 to 30 seconds, then repeat on the other side. Side planks are harder than they appear—many people find their hips dipping downward, which reduces effectiveness. If this is difficult, modify by dropping your lower knee to the floor or using your hand instead of your forearm for support.
Stretching and Flexibility—Addressing Tightness to Support Stability
While strengthening is crucial, stretching is equally important because tight muscles limit your range of motion and can pull the sacroiliac joint out of alignment. Three key stretches are recommended: hamstring stretches, piriformis stretches, and hip flexor stretches. For hamstring stretches, lie on your back with one knee bent and the other leg extended upward. Use a towel or strap around your thigh to gently pull your leg toward your chest, feeling a stretch along the back of your thigh. Hold for 15 to 30 seconds on each side. The piriformis is a deep muscle in the glute region that often tightens and can contribute to sacroiliac pain.
To stretch it, lie on your back and cross one ankle over the opposite knee, then pull your bottom leg toward your chest. You should feel a stretch deep in your glute. Hold for 15 to 30 seconds on each side. Hip flexor stretches can be performed in a half-kneeling position: kneel on one knee, place the other foot in front with that knee bent, and gently lean forward until you feel a stretch in the front of the back hip. Hold for 15 to 30 seconds. One limitation is that stretching alone does not strengthen the joint—stretching must be combined with the strengthening exercises above to be fully effective.

Progression and Avoiding Common Mistakes That Can Delay Recovery
As you become stronger over the first few weeks, you’ll naturally want to progress your exercises. A safe approach is to increase either the number of repetitions, the duration of holds, or the difficulty of the movement, but not all three simultaneously. For example, if you’ve been doing 15 pelvic tilts, progress to 20 before adding more challenging variations. Similarly, if you’ve been holding a bridge for five seconds, increase to eight seconds before moving to single-leg bridges.
Progressing too quickly is one of the most common reasons people plateau or re-injure themselves. Another critical point is to move with full awareness of your body position and muscle activation. Rushing through exercises or performing them while distracted reduces their effectiveness—you won’t activate the necessary muscles if your mind isn’t engaged in the movement. Additionally, if any exercise causes sharp pain in the sacroiliac joint area (as opposed to muscle fatigue), stop immediately and consult your physical therapist. Some discomfort in the working muscles is normal; sharp pain is a warning sign.
Professional Guidance and Long-Term Maintenance for Sustained Improvement
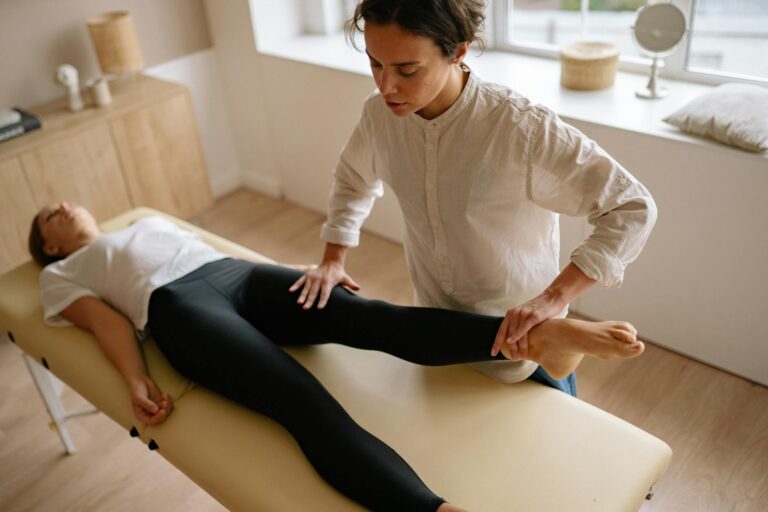
Before starting any sacroiliac strengthening program, it’s important to consult with a physician or physical therapist to ensure your condition is appropriate for exercise-based treatment. A professional can assess your movement patterns, identify which muscles are weak, rule out other conditions, and design a program tailored to your specific needs. For some people, professional guidance from a physical therapist is especially helpful early on to ensure proper exercise form and progression.
Once you’ve established a routine and experienced improvement, maintaining your results requires ongoing exercise. The strengthening work doesn’t need to be as intensive as the initial rehabilitation phase—a maintenance program of two to three sessions per week is often sufficient to prevent recurrence. Many people find that integrating these exercises into their regular fitness routine, or performing them on alternate days, becomes sustainable long-term. For individuals in dementia care settings or those with mobility limitations, these exercises can also support overall balance, coordination, and independence in daily activities.
Conclusion
The six exercises recommended by doctors for sacroiliac joint strengthening—pelvic tilts, bridges, clamshells, bird-dogs, side planks, and targeted stretches—work by restoring stability to a joint that has become unstable from weakness or muscle imbalance. Clinical research demonstrates that consistent application of these exercises produces measurable improvement in pain and function within three weeks, with results continuing to improve over longer periods. The key is performing them with proper form, progressing gradually, and combining strengthening with flexibility work.
Your next step is to consult with a physical therapist or physician to confirm that sacroiliac joint dysfunction is the source of your pain and to receive guidance on implementing these exercises safely. Many people find that starting with a supervised session or two helps ensure they’re performing the movements correctly before progressing independently at home. Consistent effort over several weeks will typically yield significant improvements in pain and mobility.